
In today’s oversaturated inboxes, getting your email noticed — let alone opened — is no easy feat. In this article, we’ll explore the power of video in email campaigns, how to embed video content the right way, best practices to maximise performance, and how to track your results. Whether you’re a startup, marketer, or creative agency, using video in your emails can be a game-changer for audience retention and conversions.
Livestream Setup Checklist: What Equipment Does a Livestream Production Team Bring?
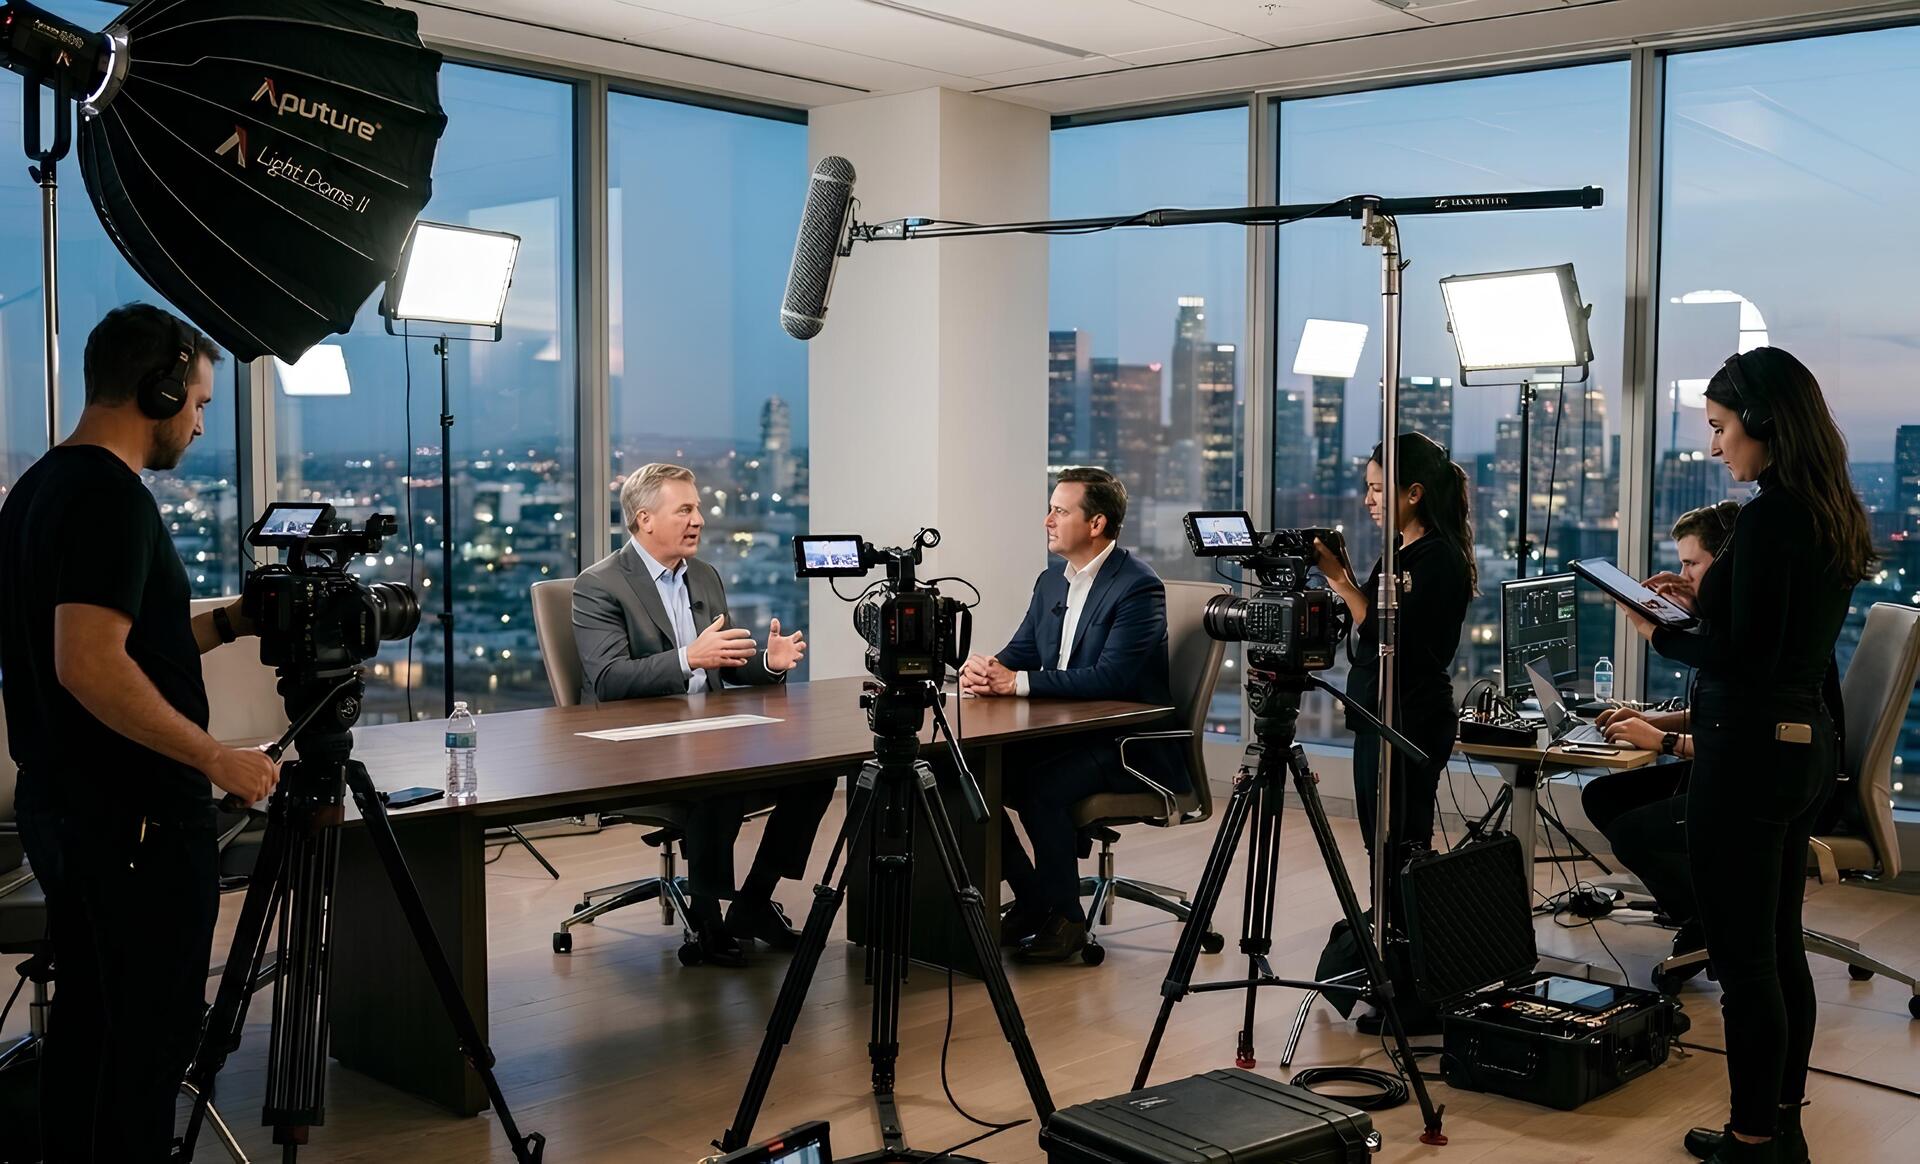
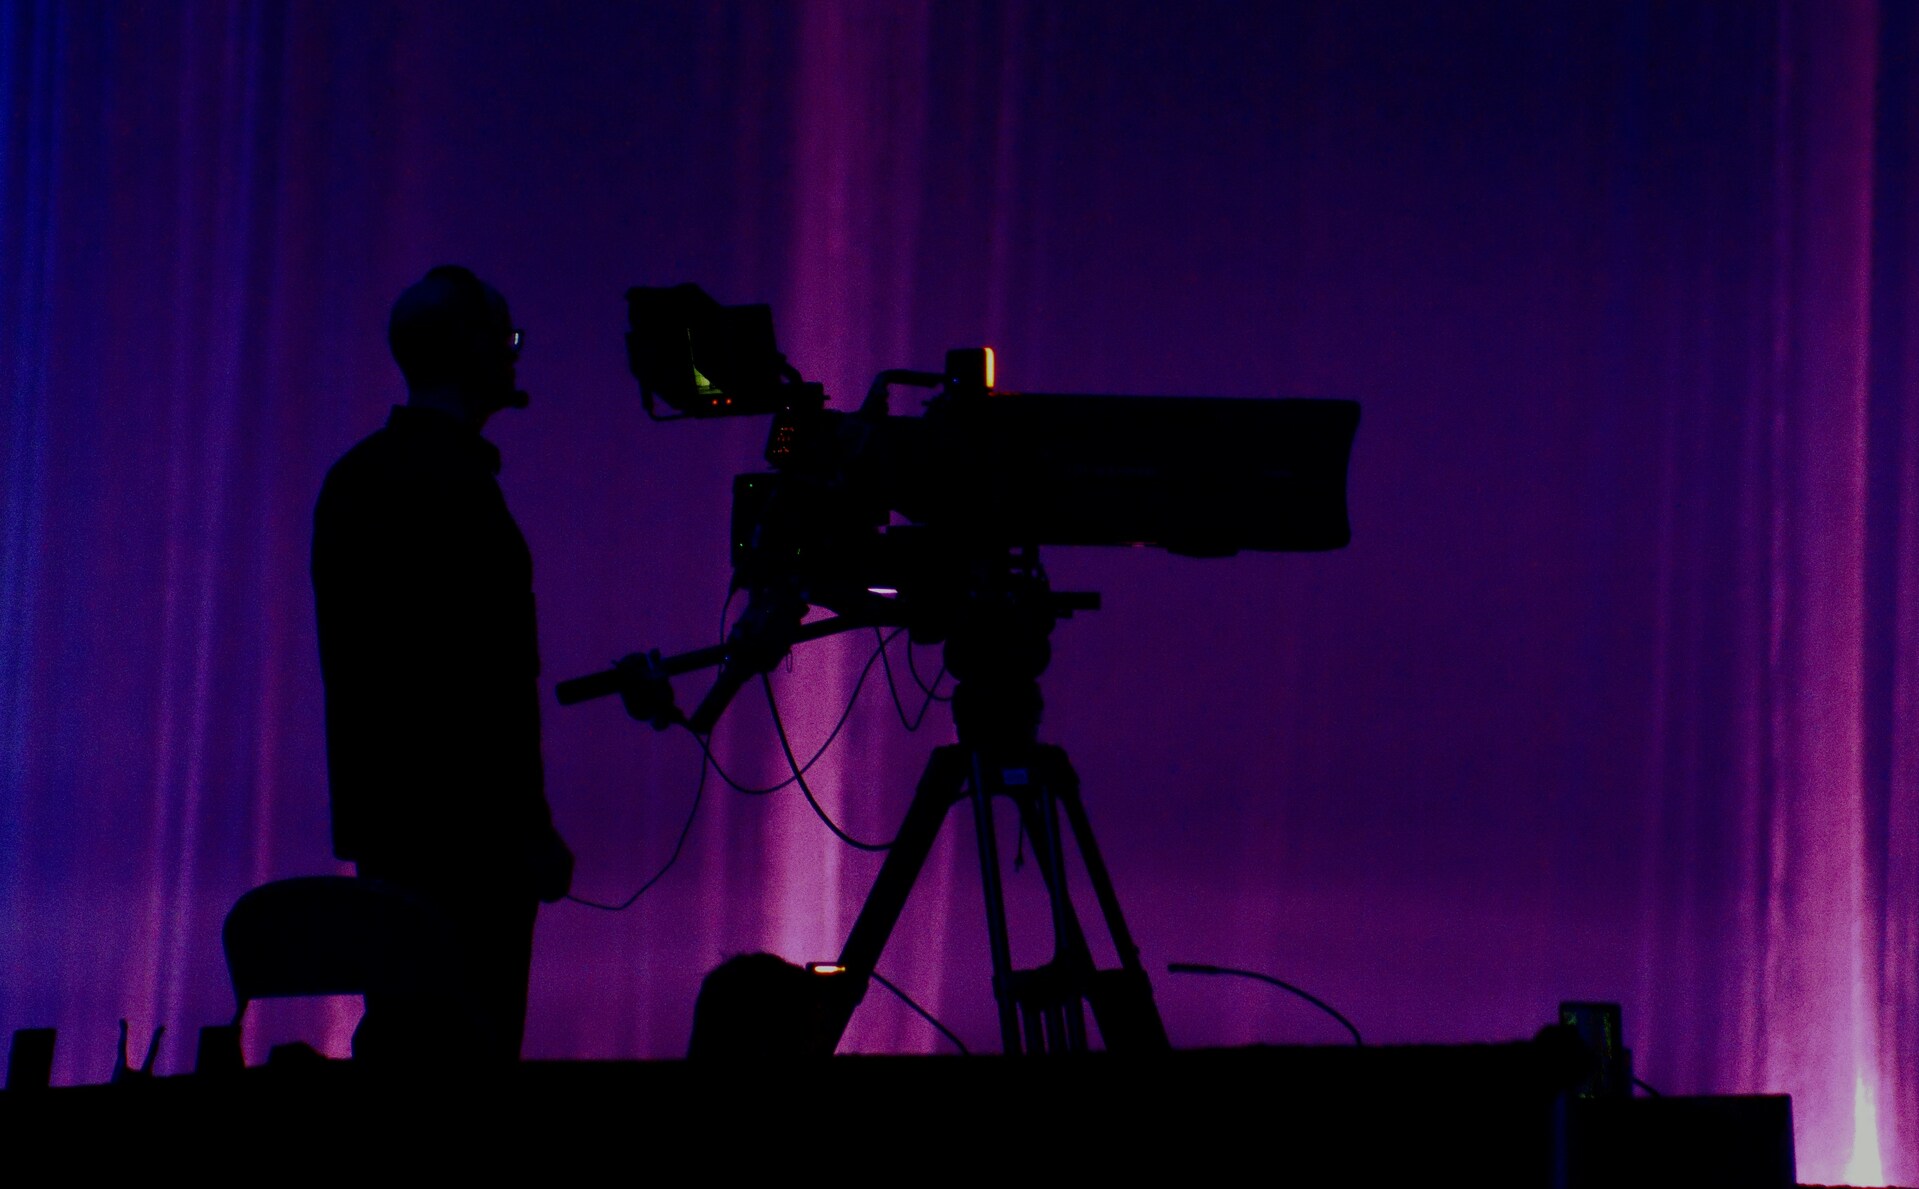
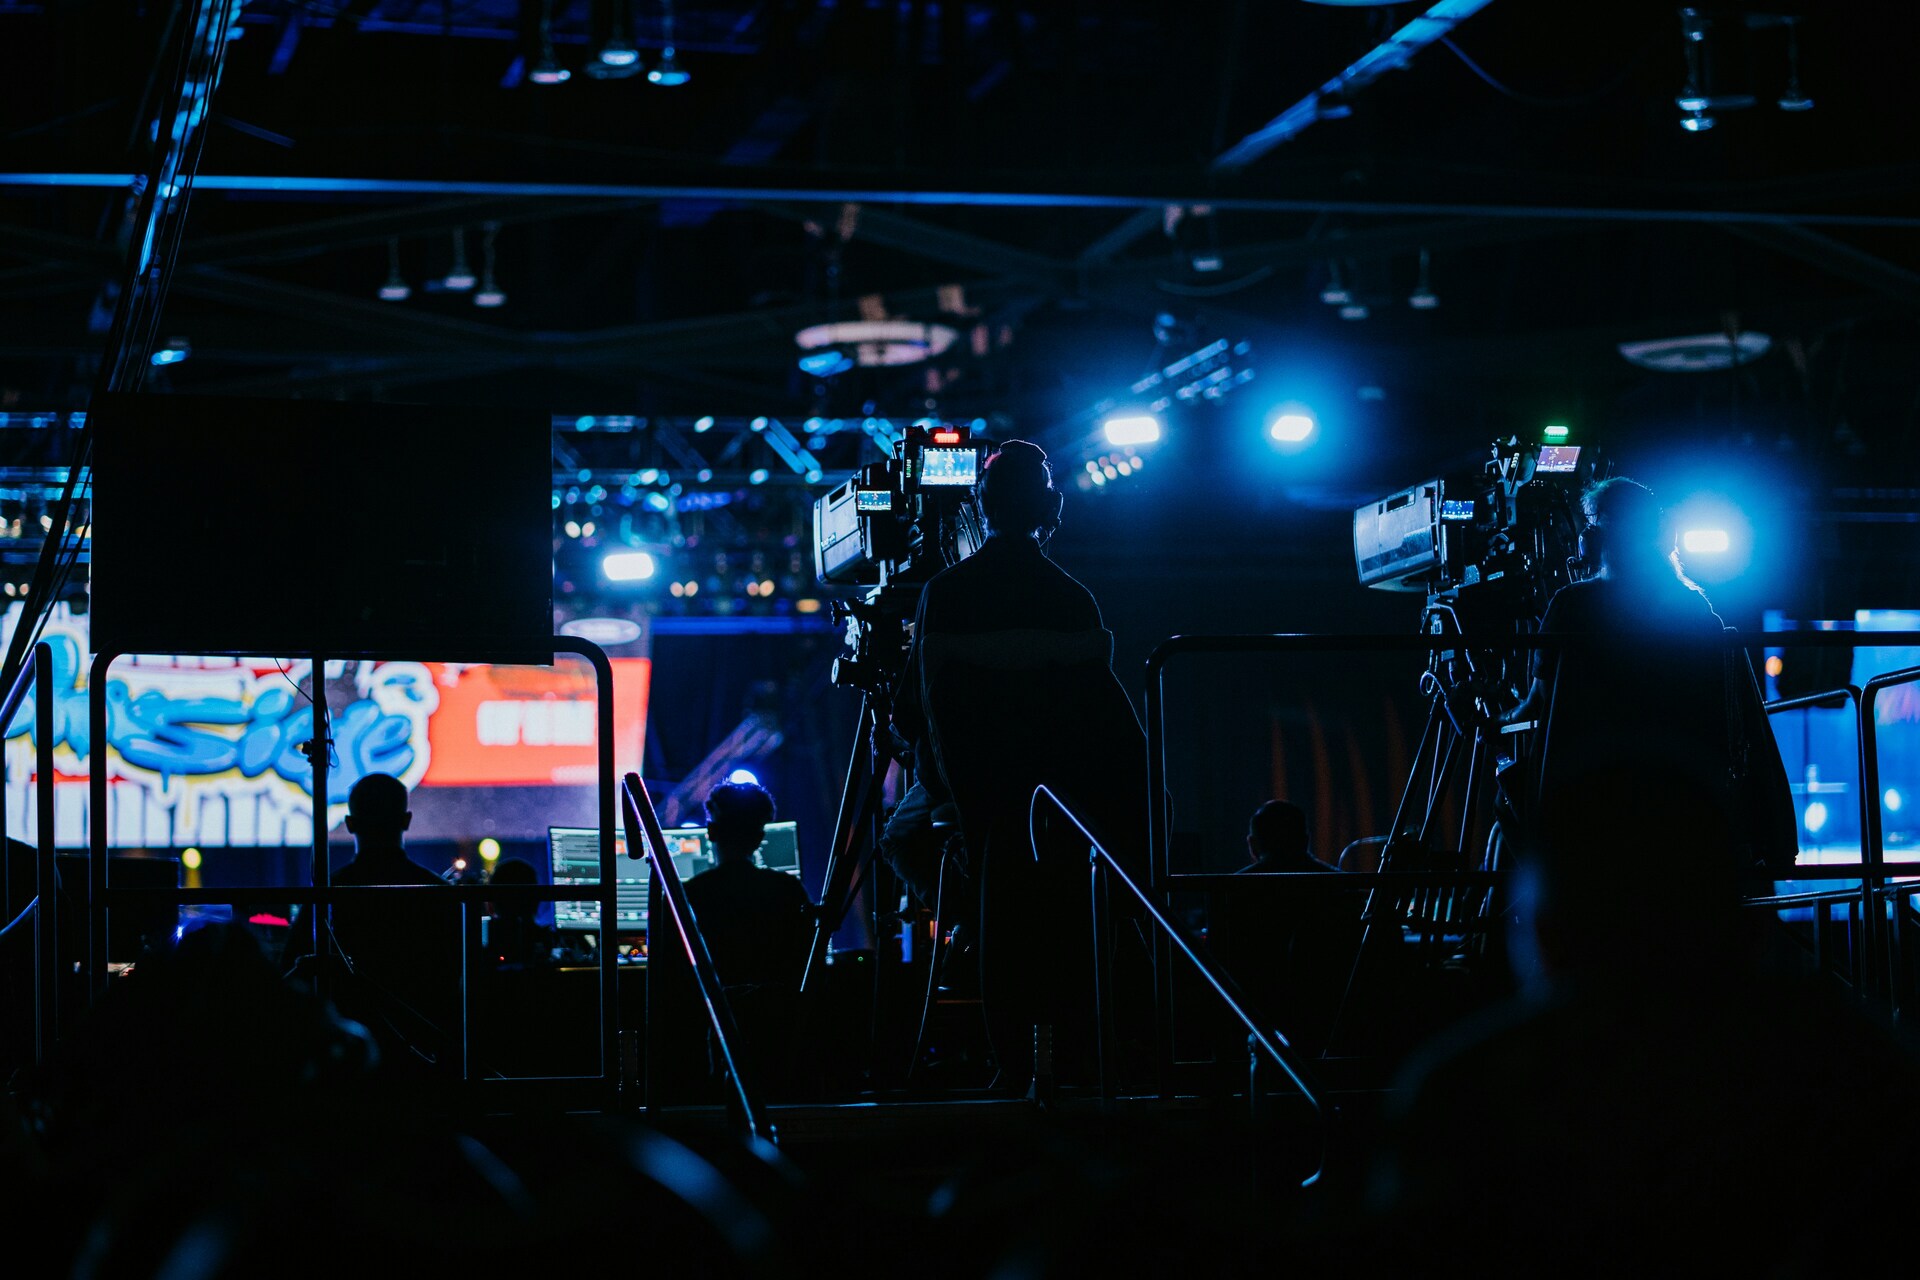
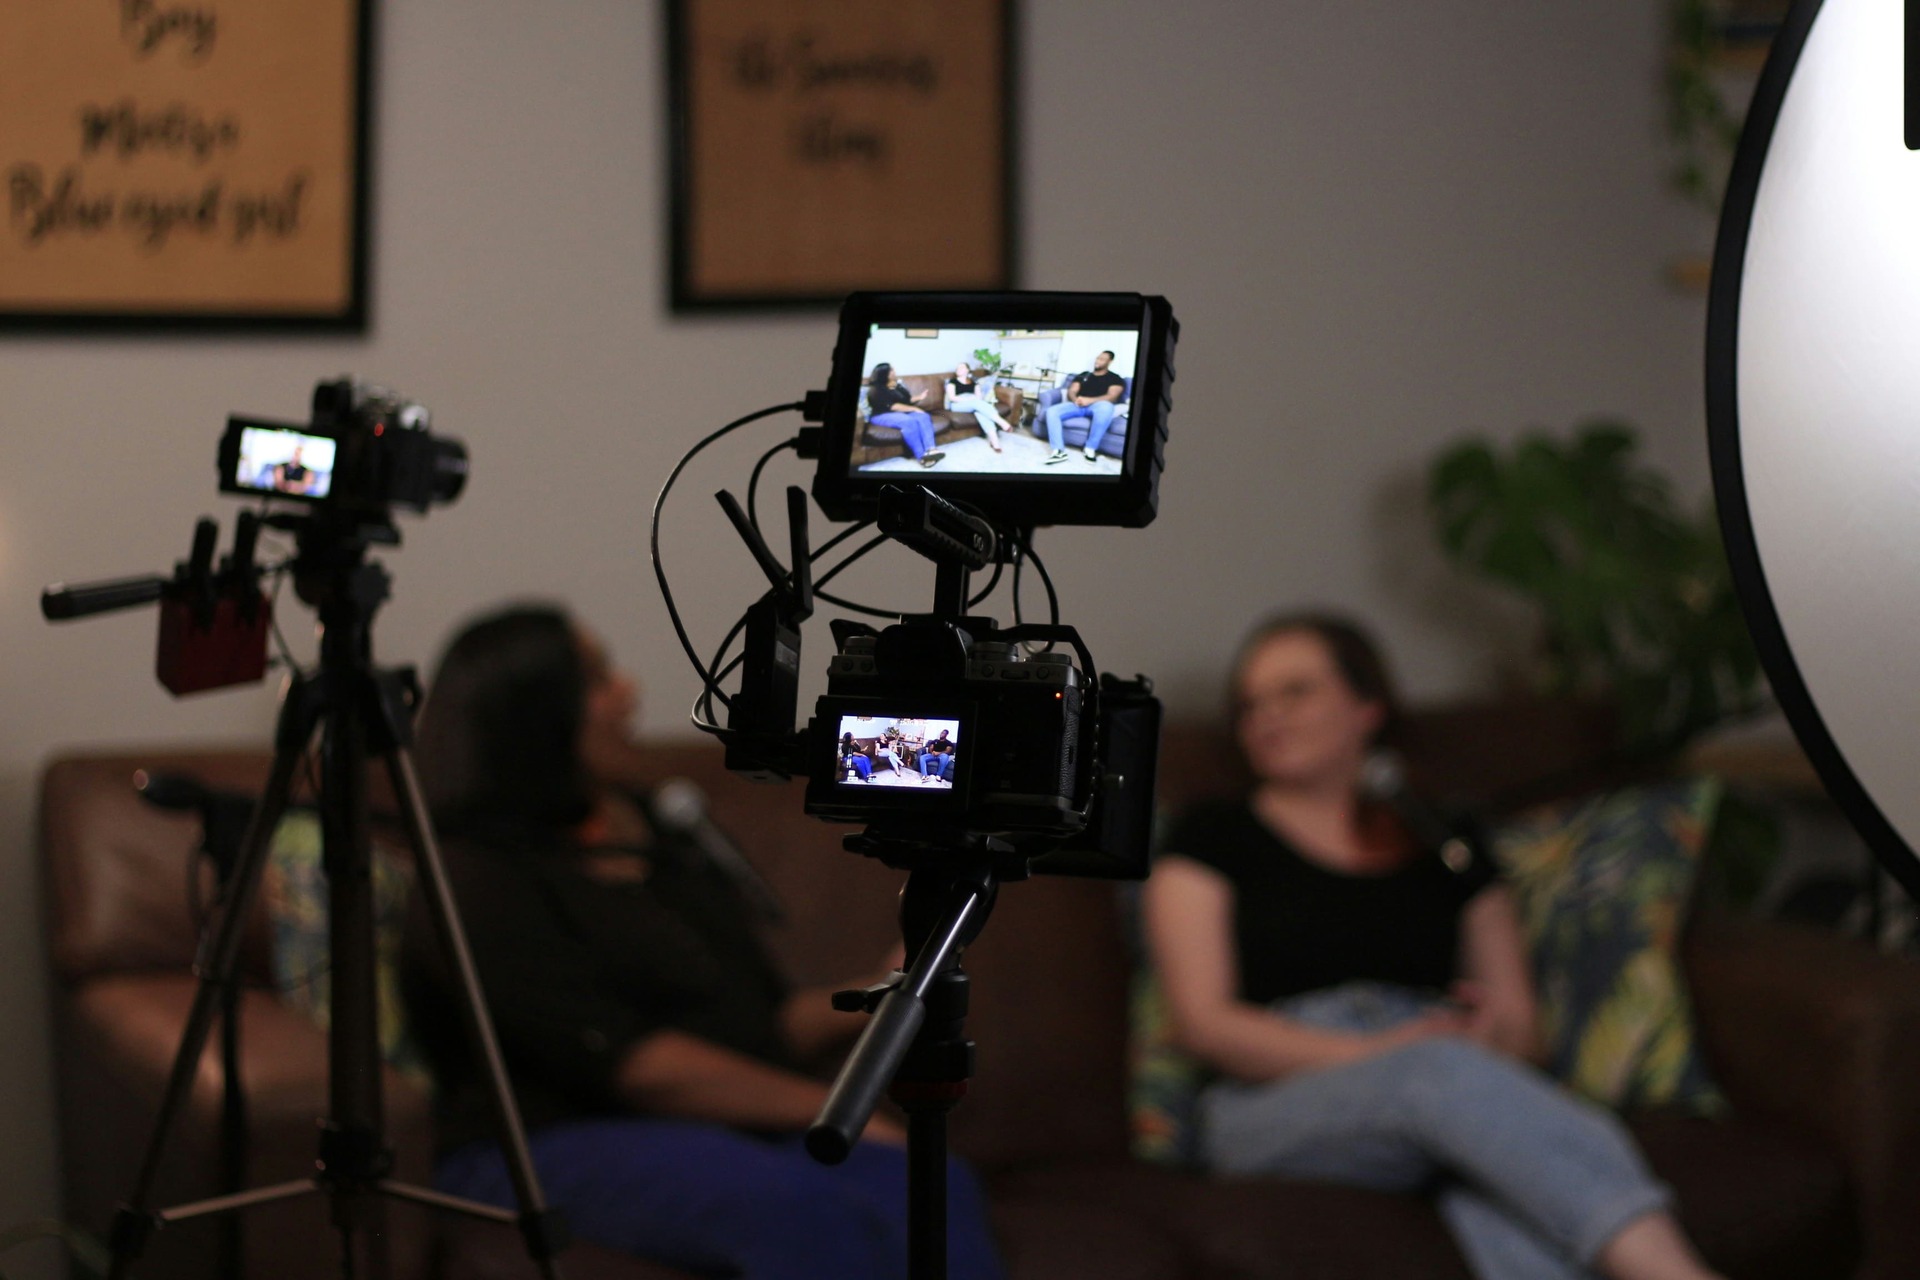
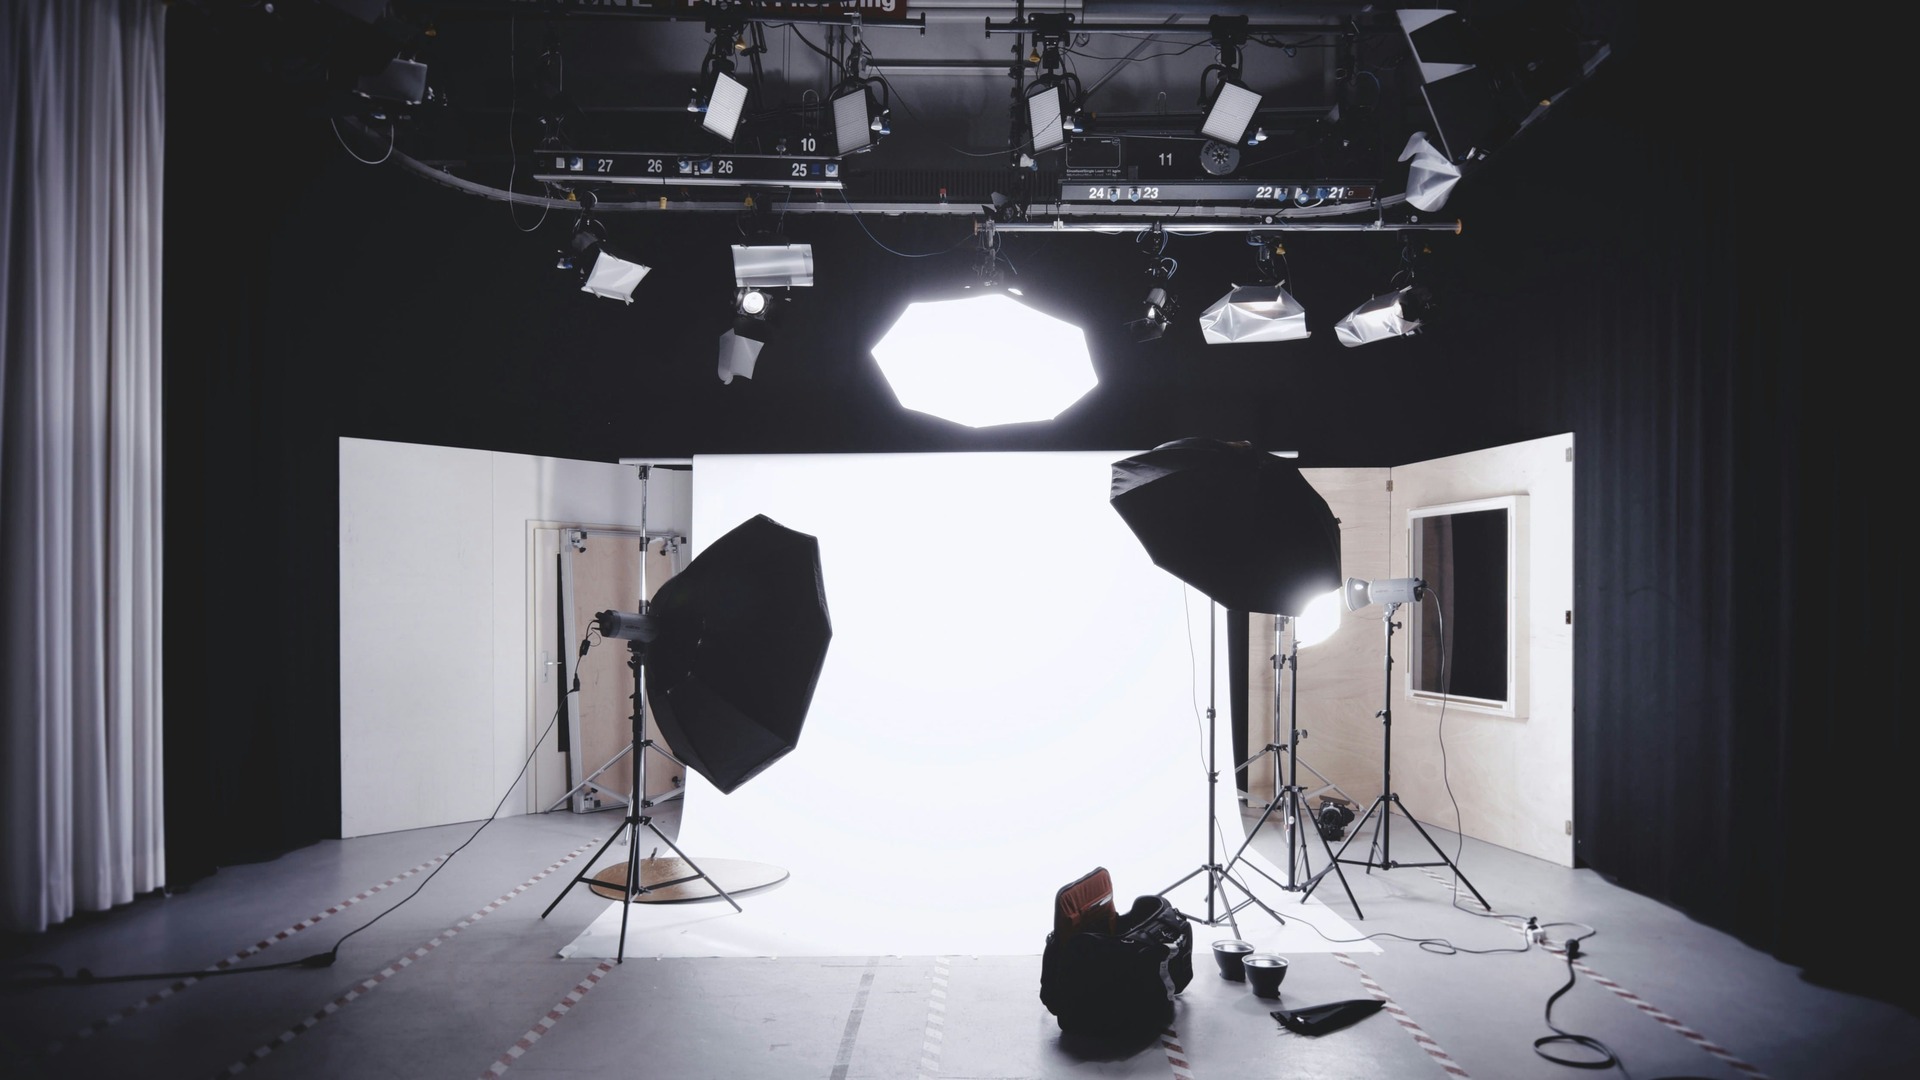
From our experience working with Irish corporate and event clients, most professional livestream setups follow a similar pattern — multiple cameras, video switching, and audio integration are standard.
Professional livestream production teams bring the specialist equipment required to capture, manage, and broadcast the event. The goal is to create a professional viewing experience for online audiences while ensuring everything runs reliably in real time.
Below are the key elements typically included in a professional livestream setup.
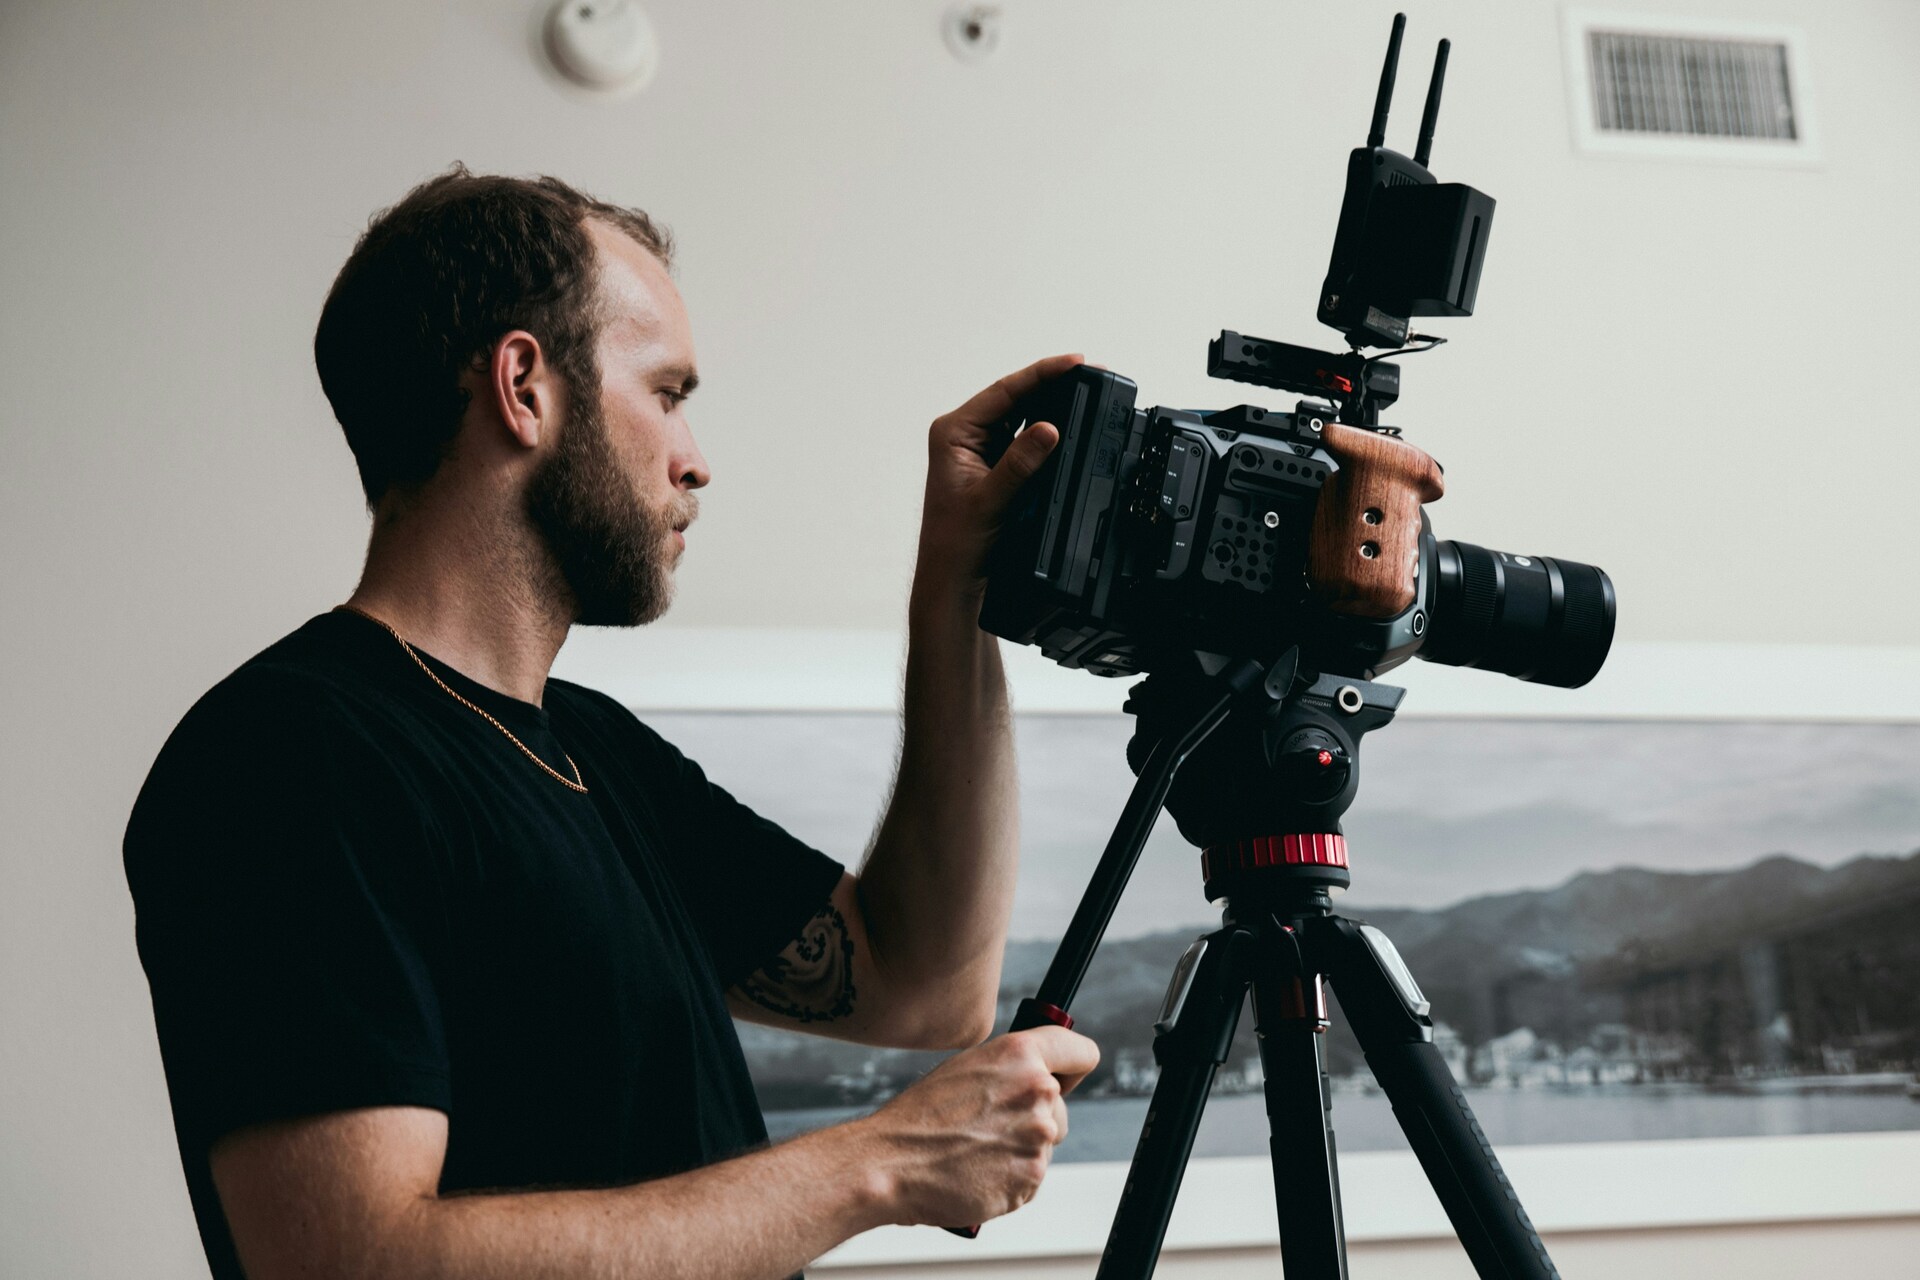
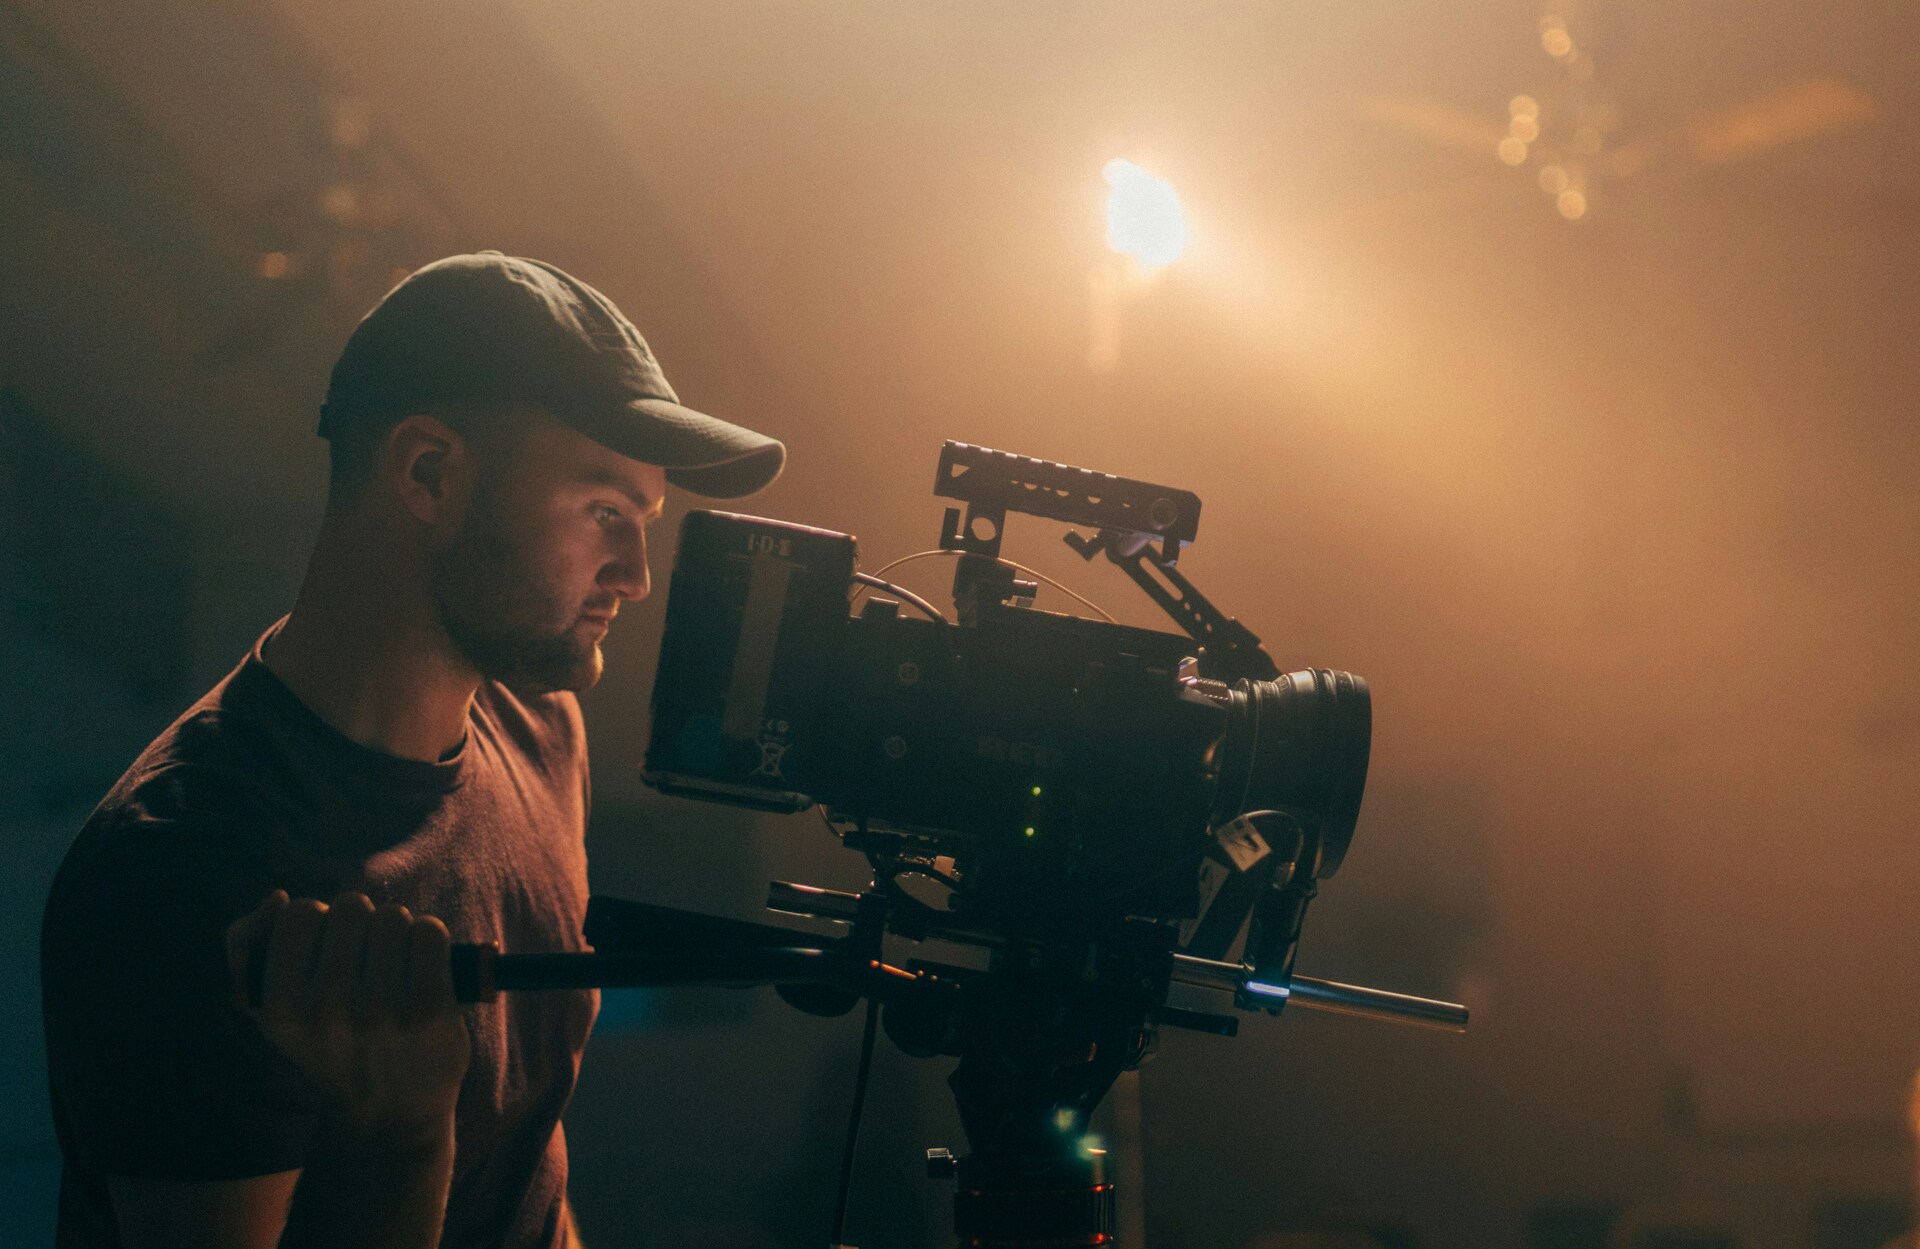
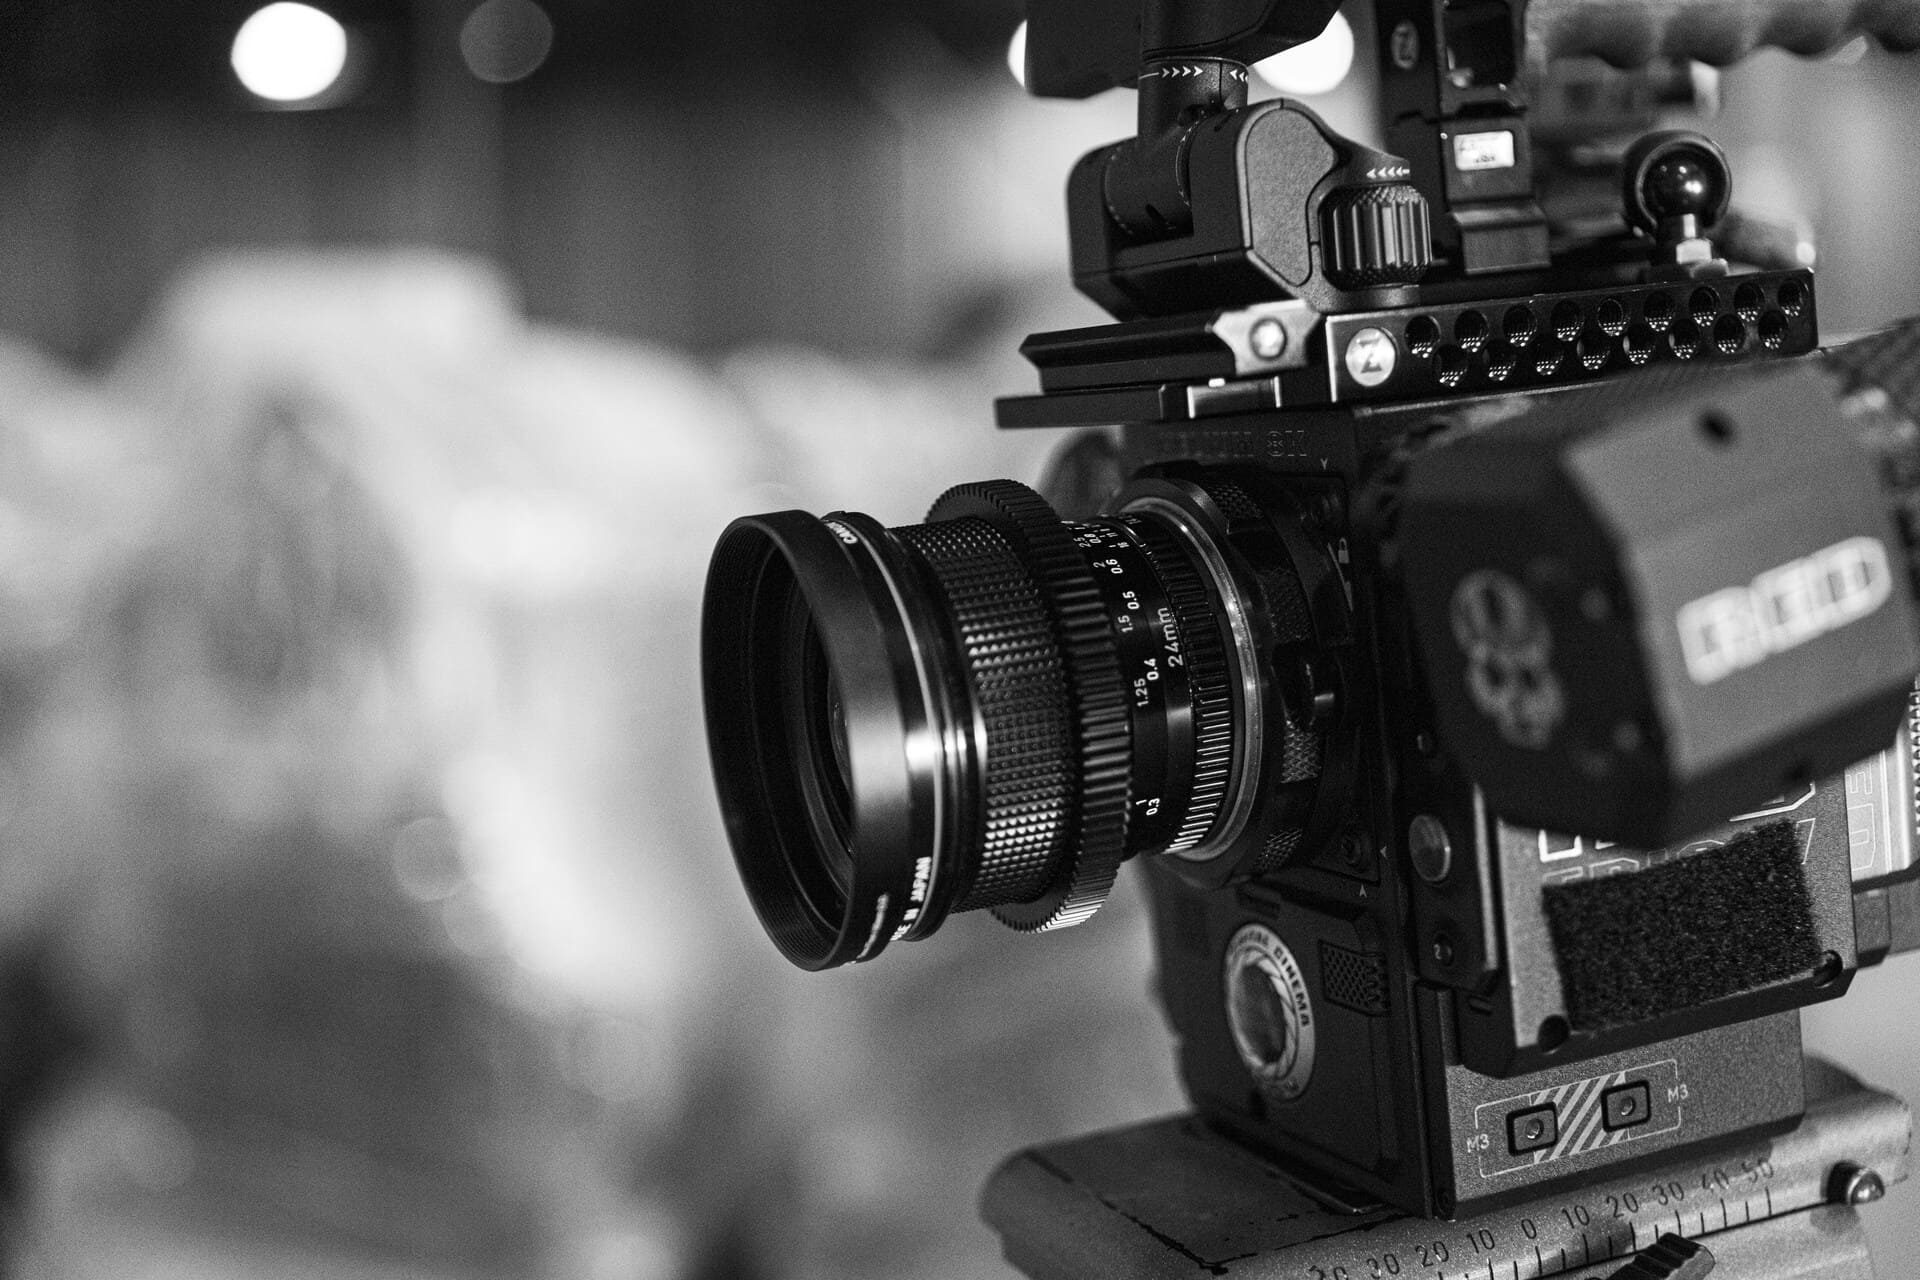
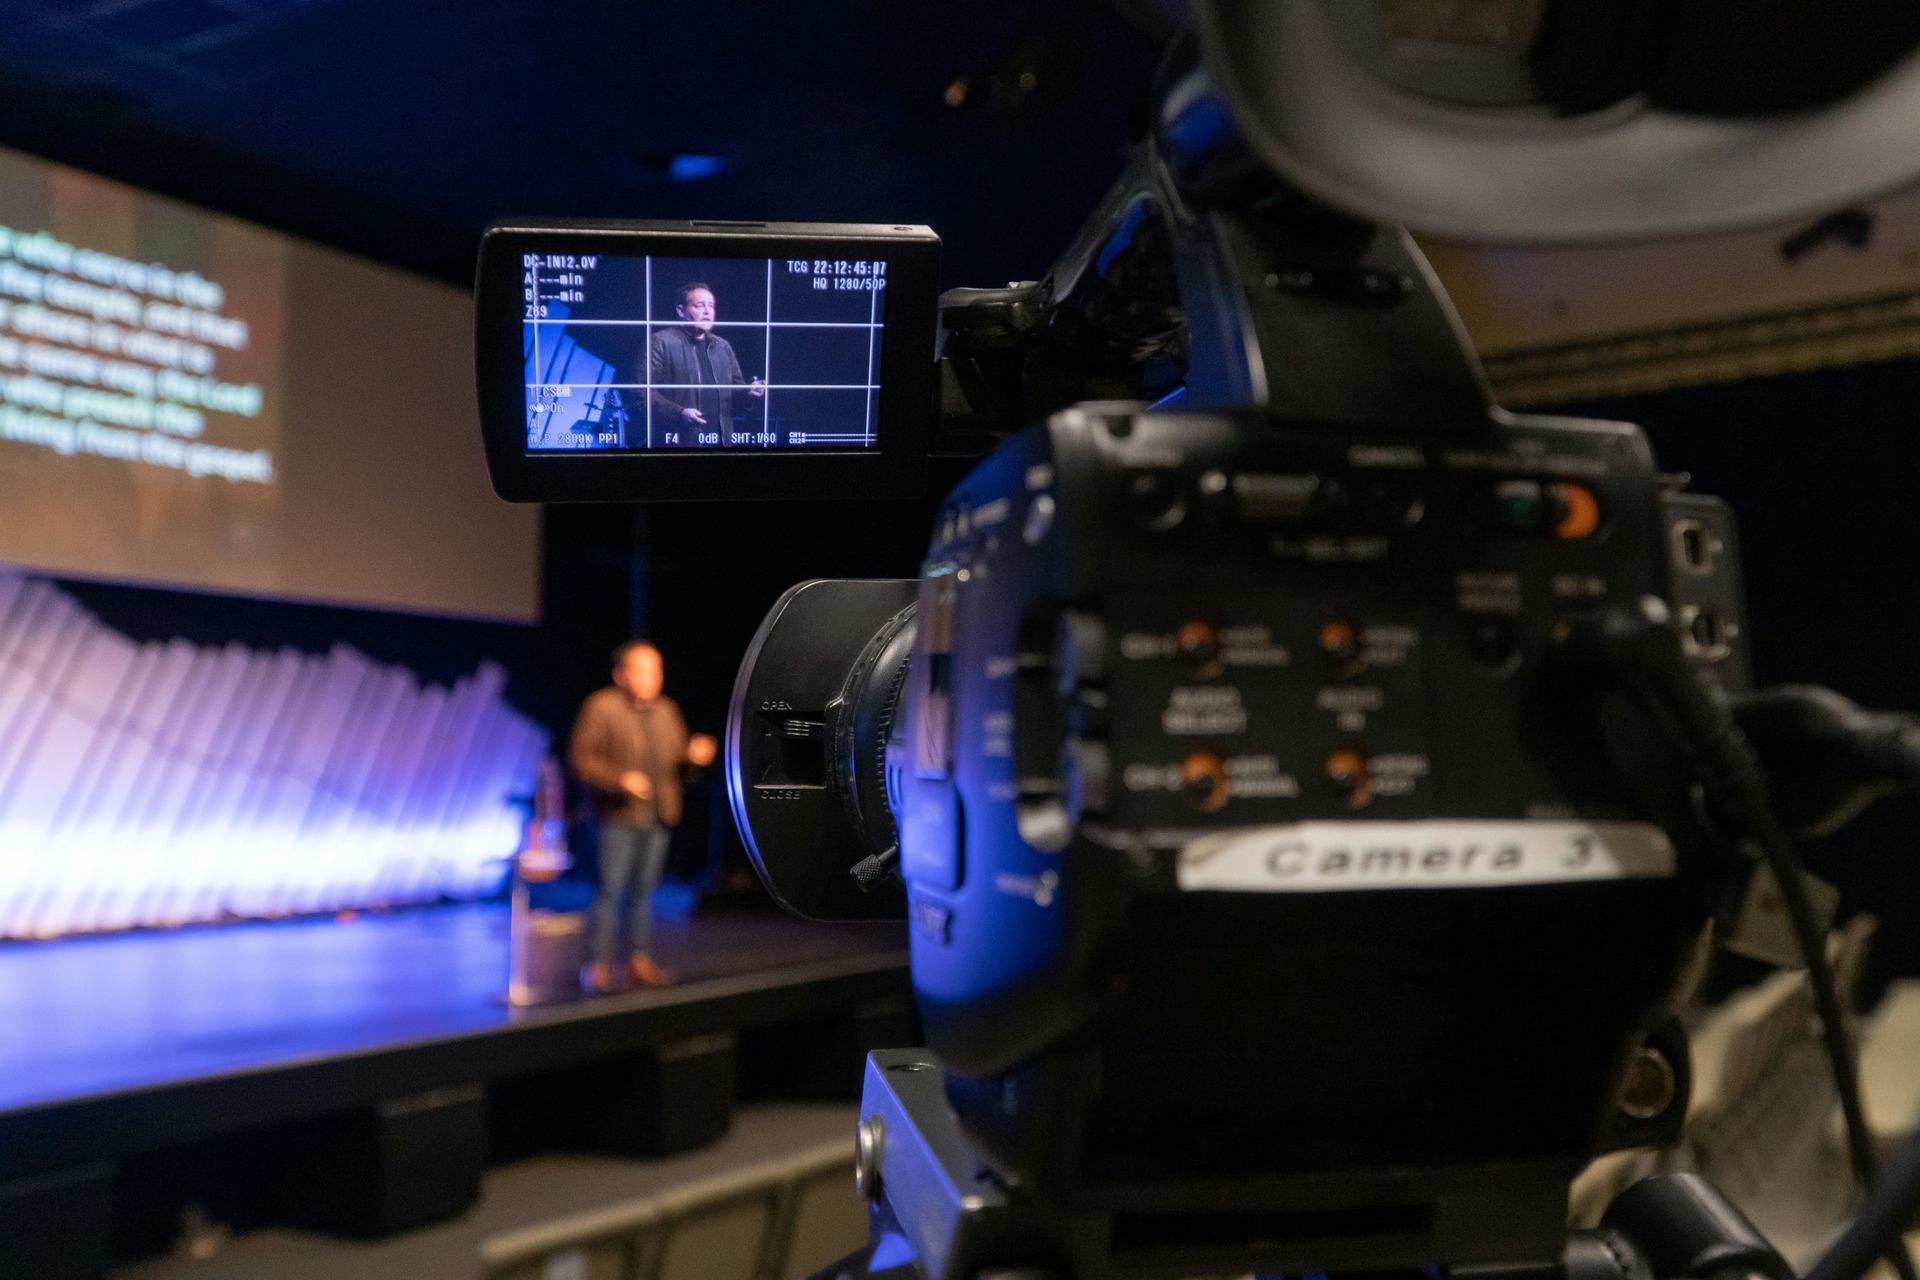
Cameras
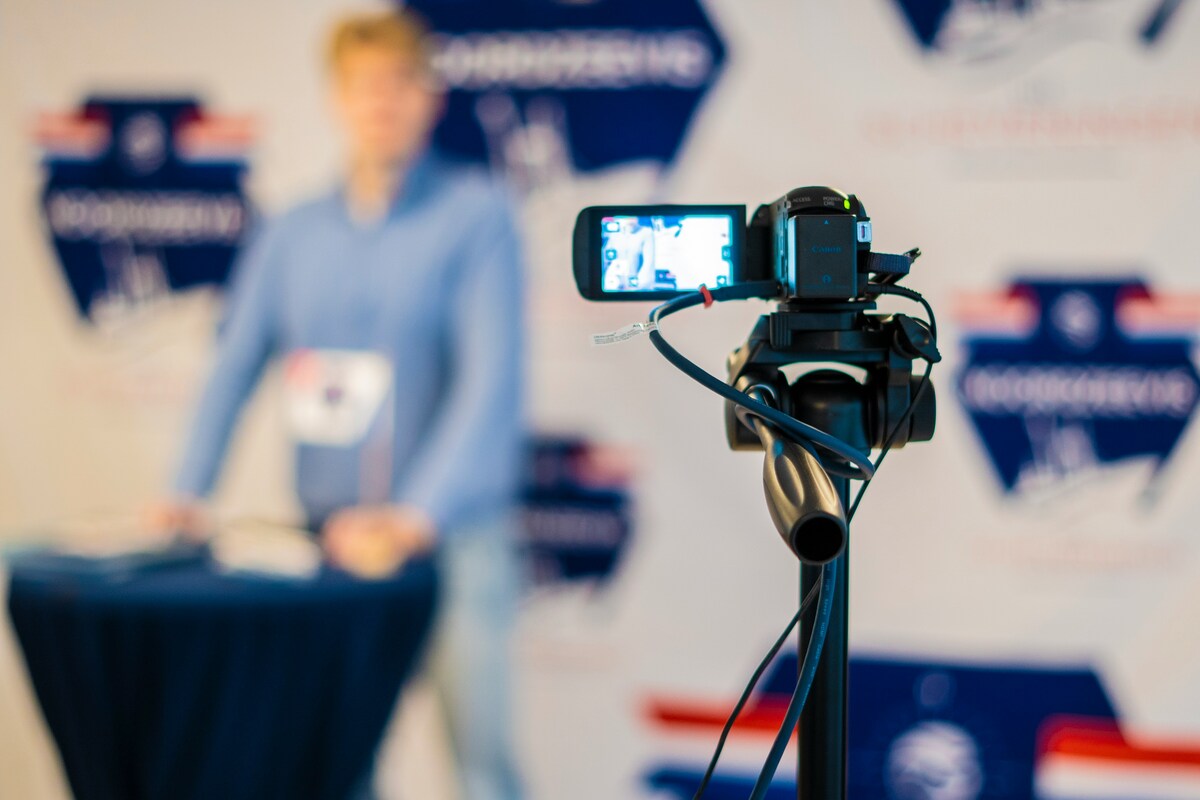
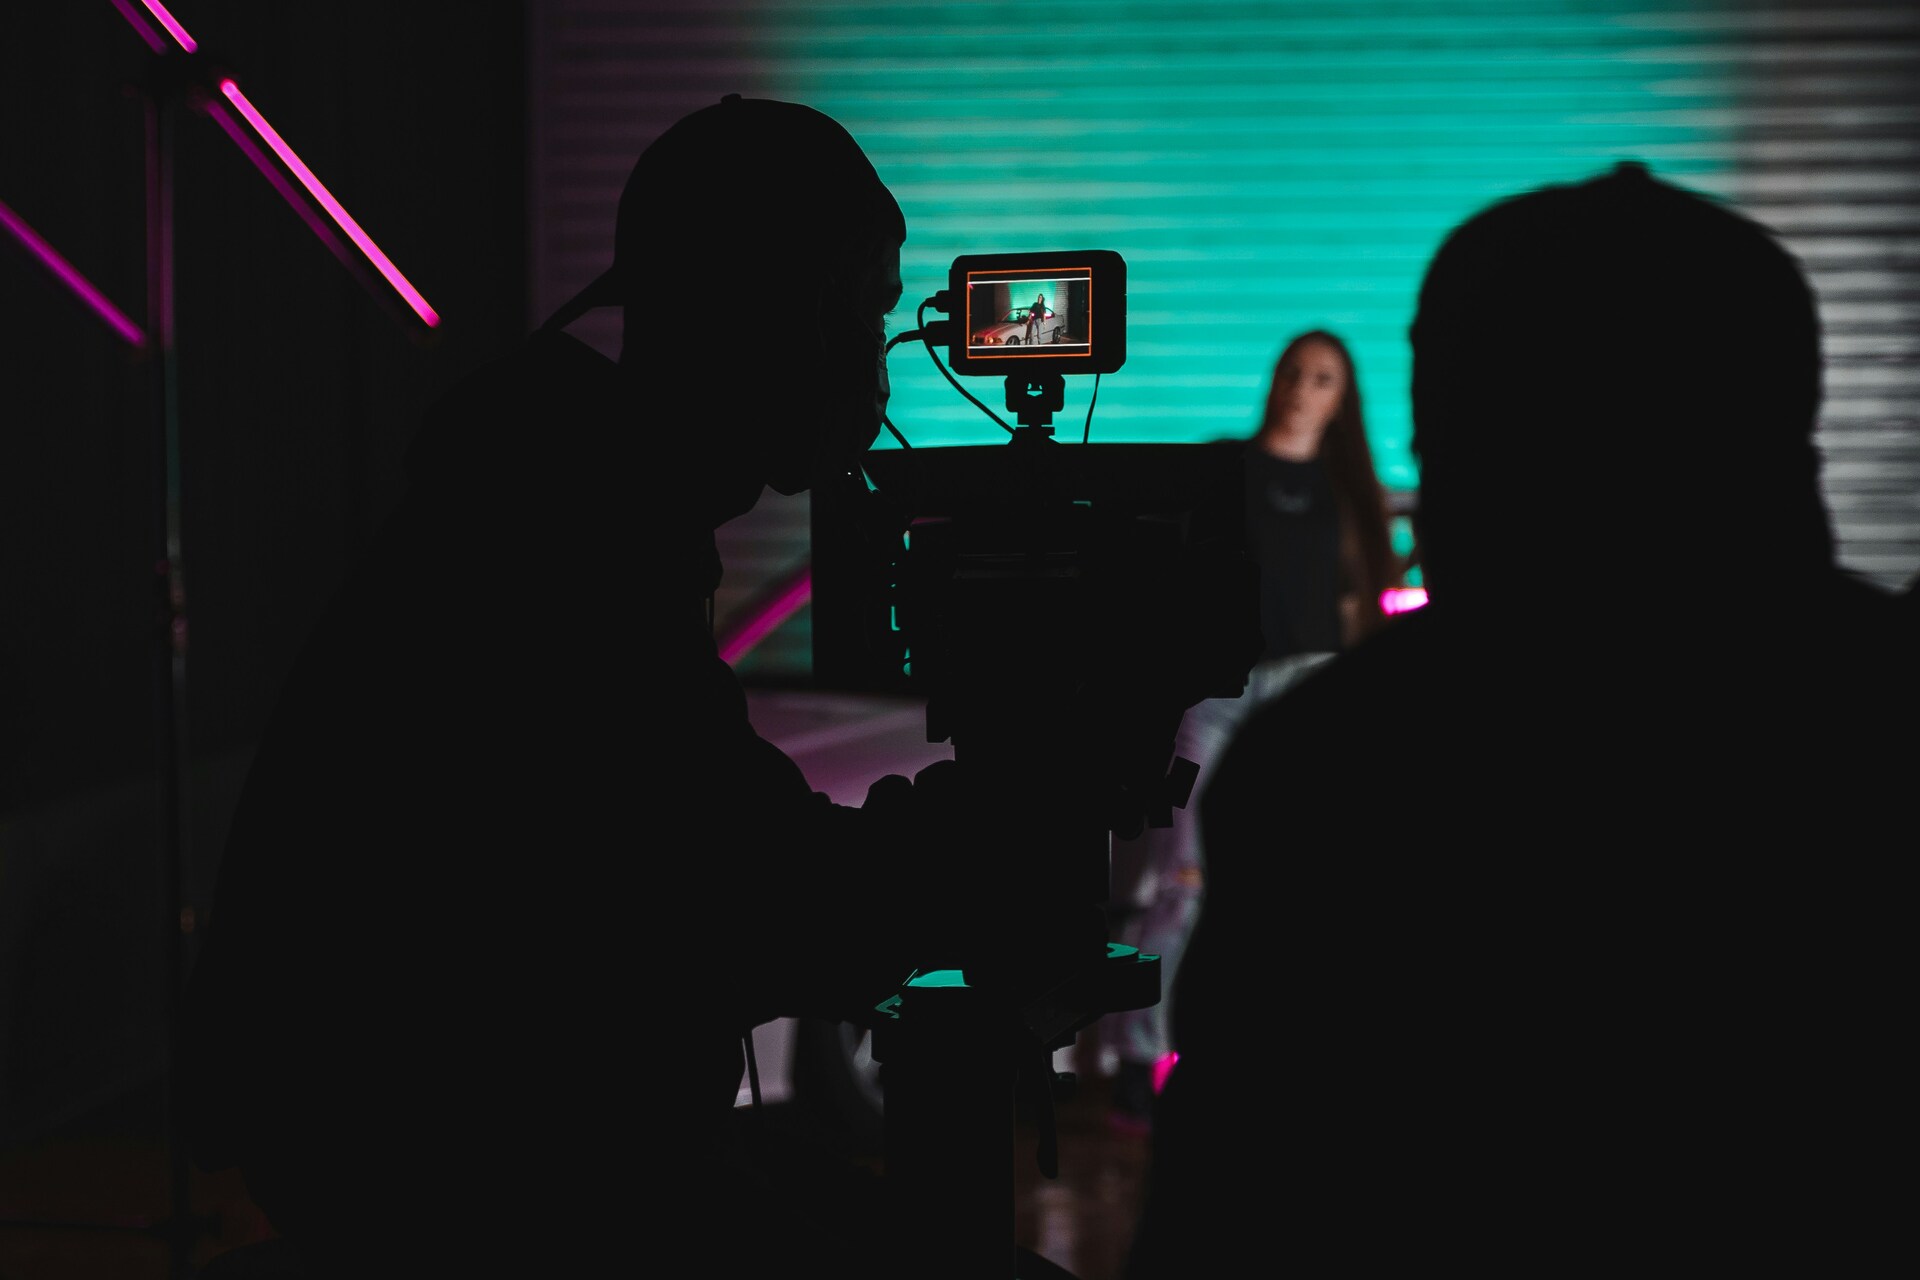
Most professional livestreams use multiple cameras rather than a single static shot.
This allows the production team to create a more engaging viewing experience by switching between different angles during the broadcast.
Typical camera setups may include:
- A wide camera capturing the full stage: Often called the "Master Shot," this provides context and shows the physical environment.
- A close-up camera for speakers: Essential for capturing facial expressions and maintaining a personal connection with the remote audience.
- A camera for audience reactions: Great for showing engagement during Q&A sessions or applause.
- A roaming camera for movement or interviews: Usually mounted on a gimbal or shoulder rig to provide cinematic, fluid motion.
Using multiple cameras makes the livestream feel far more dynamic and professional. Instead of watching a single fixed shot for an hour, viewers see a mix of perspectives that keeps the broadcast visually interesting.
For larger events, additional cameras may be used to cover panel discussions, audience questions, or demonstrations.
Video Switching Equipment
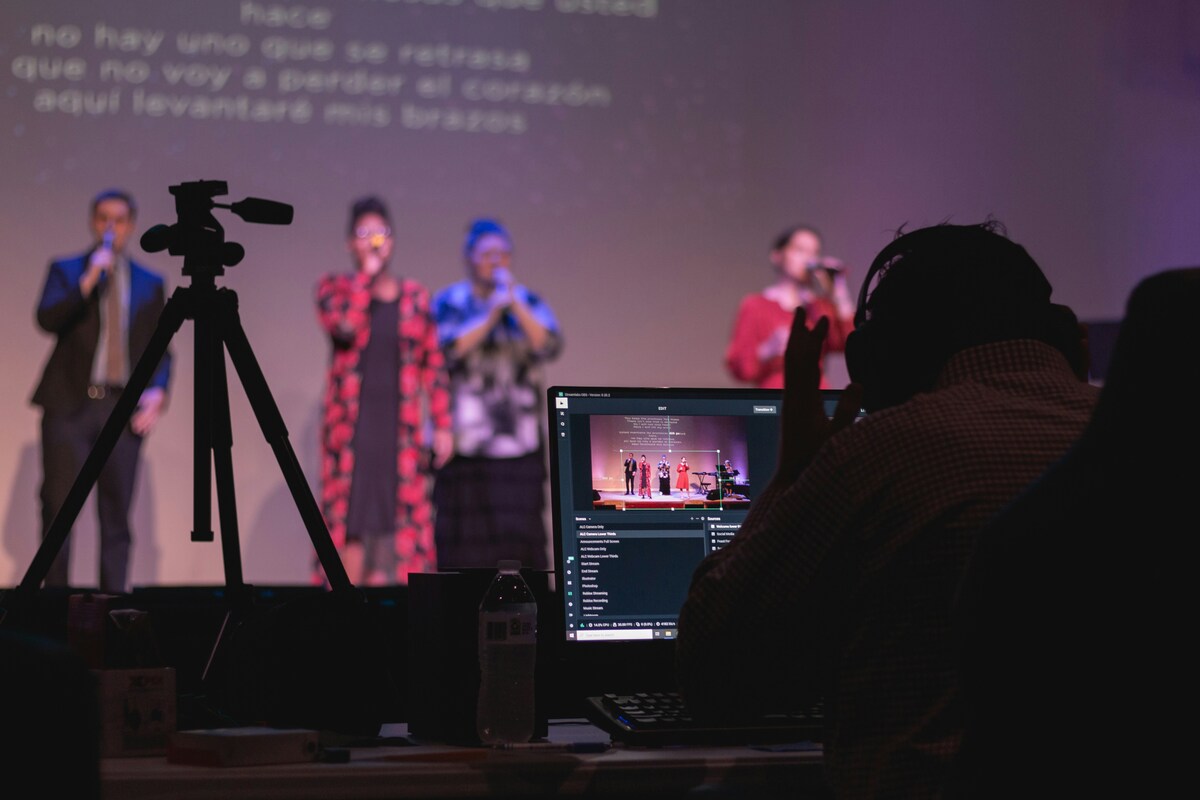
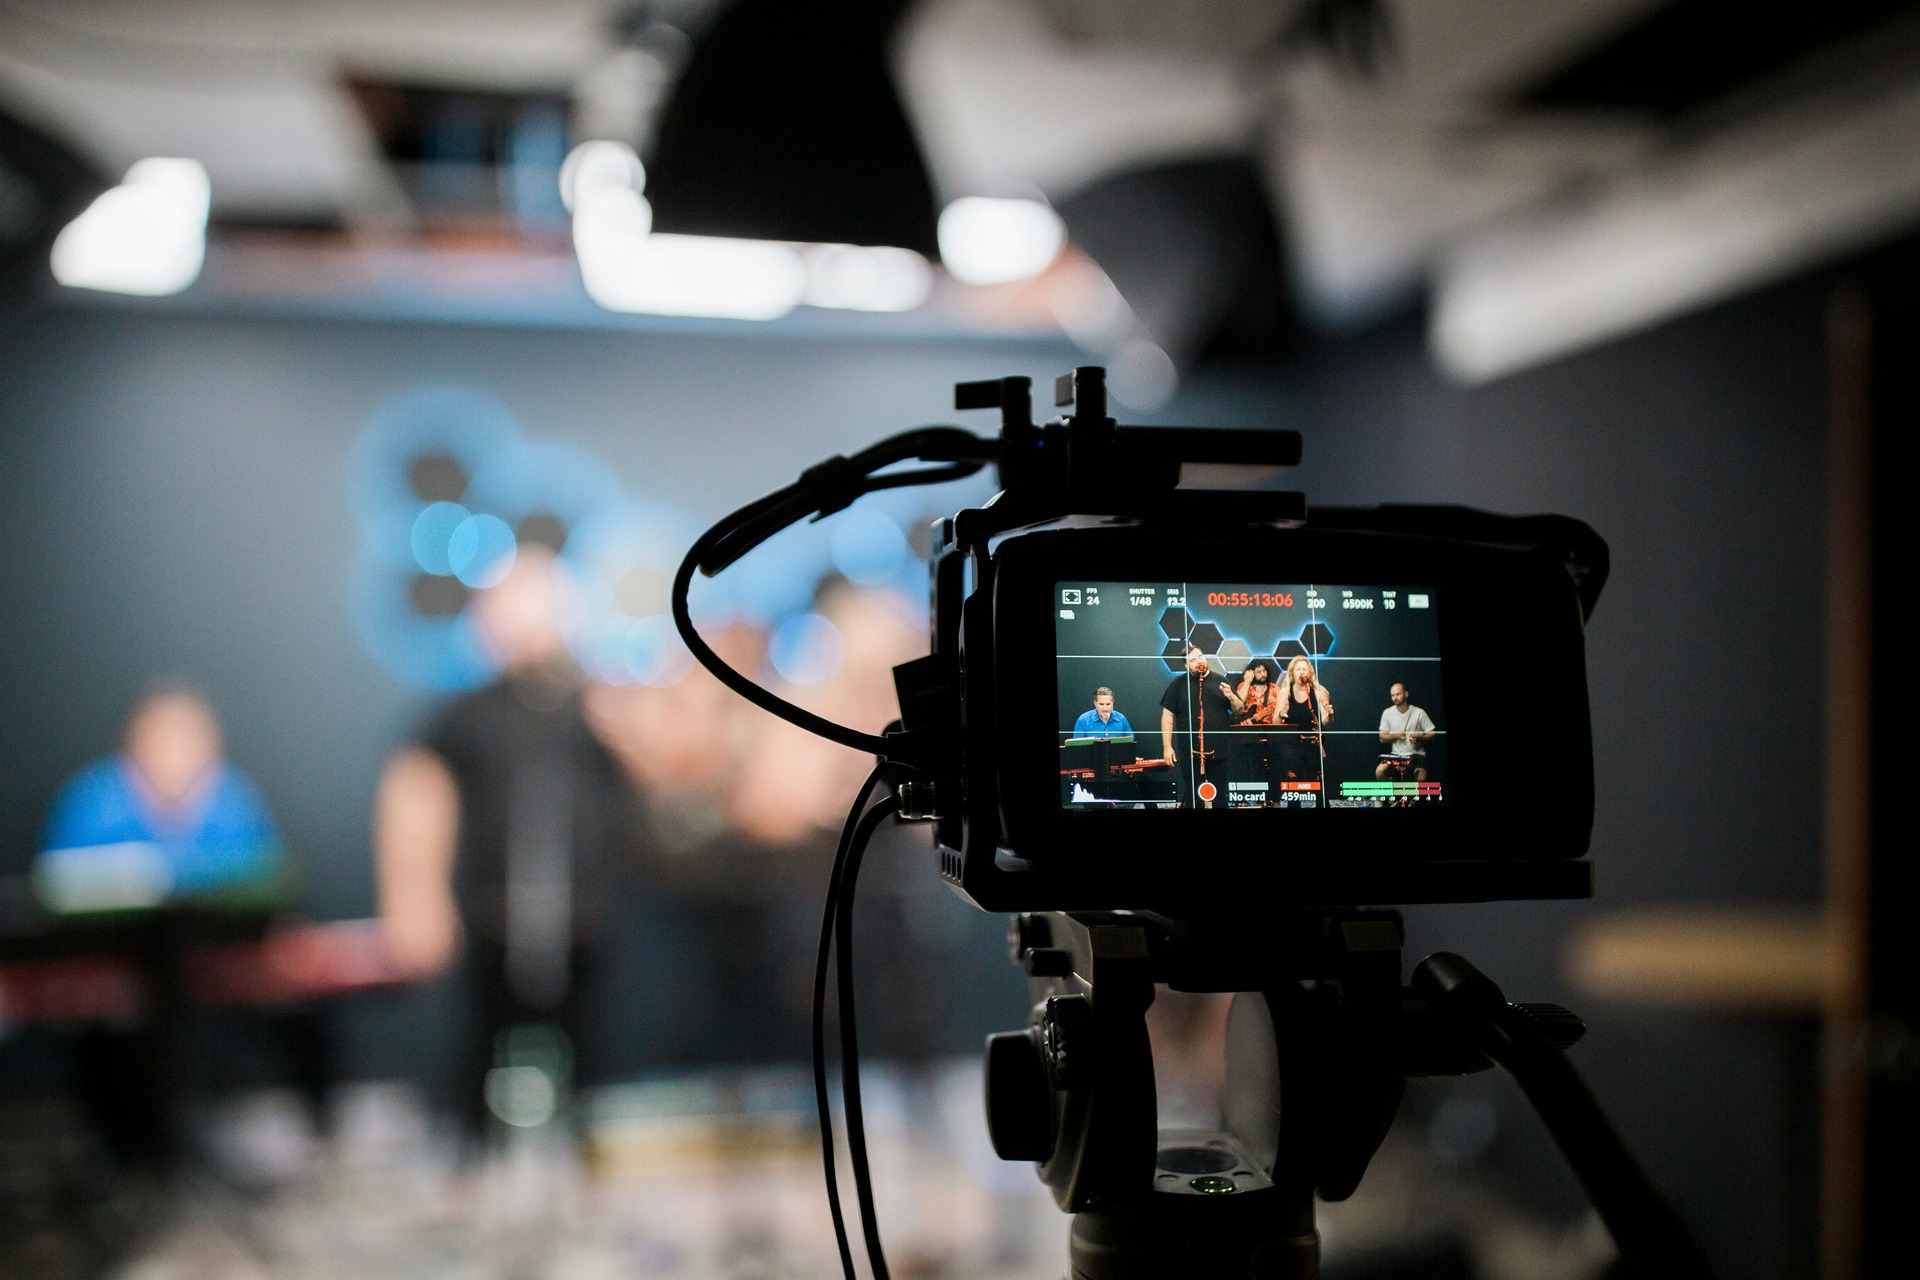
Livestreams are directed in real time using a video switcher. The switcher acts as the "brain" of the entire operation, where all video inputs converge before being sent to the audience.
This piece of equipment allows the production team to control what viewers see at any moment during the broadcast. A technician, often referred to as the Vision Mixer or Director, monitors a "Multiview" screen displaying every available camera feed and source simultaneously.
Using the switcher, the team can transition between:
- different camera angles
- presentation slides
- pre-recorded video clips
- sponsor graphics
- branded overlays
The switching process is similar to how live television broadcasts are produced. A director or technical operator chooses the most appropriate shot and switches between sources throughout the event. Transitions can be "hard cuts" for fast-paced segments or "cross-dissolves" for a softer, more corporate feel.
This is what transforms a simple camera feed into a polished, broadcast-style livestream.
Streaming Hardware and Software
Once the video feed is produced, it needs to be sent to the internet in real time. This stage, known as "encoding," involves compressing the heavy video data into a format that can travel over the web without constant buffering.
Livestream production teams bring specialised streaming hardware and software that encodes the video and transmits it to the chosen platform.
This setup usually includes:
- dedicated streaming encoders: High-performance hardware units (like Blackmagic Web Presenters or Teradek cubes).
- production laptops or control systems: Used for managing the stream's backend and monitoring the platform’s health.
- broadcast software: Programs like vMix or OBS Studio for advanced layering and scene management.
- monitoring screens: To view the "Return Feed"—exactly what the audience sees—to ensure no lag is occurring.
These systems allow the production team to monitor the broadcast and ensure everything is running correctly throughout the event.
The stream can then be sent to platforms such as:
- YouTube Live
- LinkedIn Live
- Facebook Live
- private streaming platforms (like Vimeo OTT or Brightcove)
- internal company event portals
The production team will usually test the streaming connection before the event to ensure stability and avoid interruptions. This includes performing a "Speed Test" and a "Stress Test" of the network at the venue to confirm it can handle the sustained upload required for a multi-hour HD broadcast.

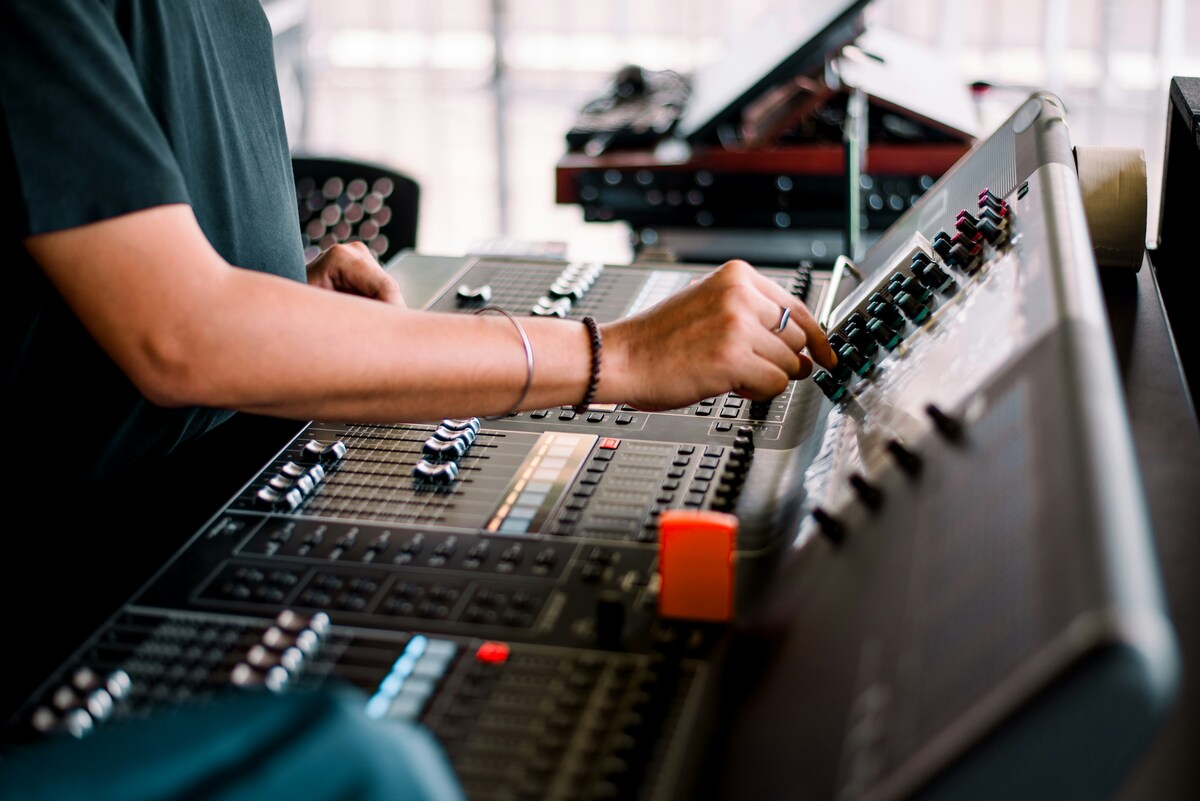
Audio Integration
High-quality audio is just as important as video in any livestream.
Viewers may tolerate minor visual issues, but poor audio quality can quickly make a broadcast difficult to watch.
Most livestream production teams integrate directly with the venue’s audio system to capture clear sound from microphones used during the event.
This typically includes:
- presenter microphones: Often lapel (lavalier) or headset mics for hands-free speaking.
- panel discussion microphones: Usually "tabletop" or "gooseneck" mics positioned in front of each seated guest.
- handheld microphones for audience questions: Vital for ensuring the remote audience can hear the context of the answers being given.
If needed, the production team can also supply additional microphones or backup audio recording systems to ensure the broadcast captures clean sound.
Graphics and Branding
Professional livestreams often include visual graphics and branding elements that enhance the viewing experience.
These elements help the broadcast feel more structured and visually polished.
Common livestream graphics include:
- opening title screens: To welcome viewers as they join.
- countdown timers before the event begins: To build anticipation and let viewers know exactly when the content starts.
- speaker name graphics: Also known as "Lower Thirds," these identify the person speaking and their job title.
- sponsor logos: Crucial for monetized events or partnership-driven conferences.
- branded overlays: Subtle borders or frames that keep the company's color palette present.
- lower-third titles: Used for social media handles, website URLs, or key takeaway bullet points.
These elements not only improve the production quality but also reinforce brand identity throughout the broadcast.
For corporate events or conferences, branded graphics can help create a consistent visual experience across both the live event and the online broadcast.
What the Venue or Client Typically Needs to Provide
While the production team brings most of the equipment required for a livestream, there are a few important things that typically need to be available on-site.
Understanding these requirements helps avoid delays during setup and ensures the broadcast runs smoothly.
Reliable Internet Connection
A stable internet connection is the most important requirement for any livestream.
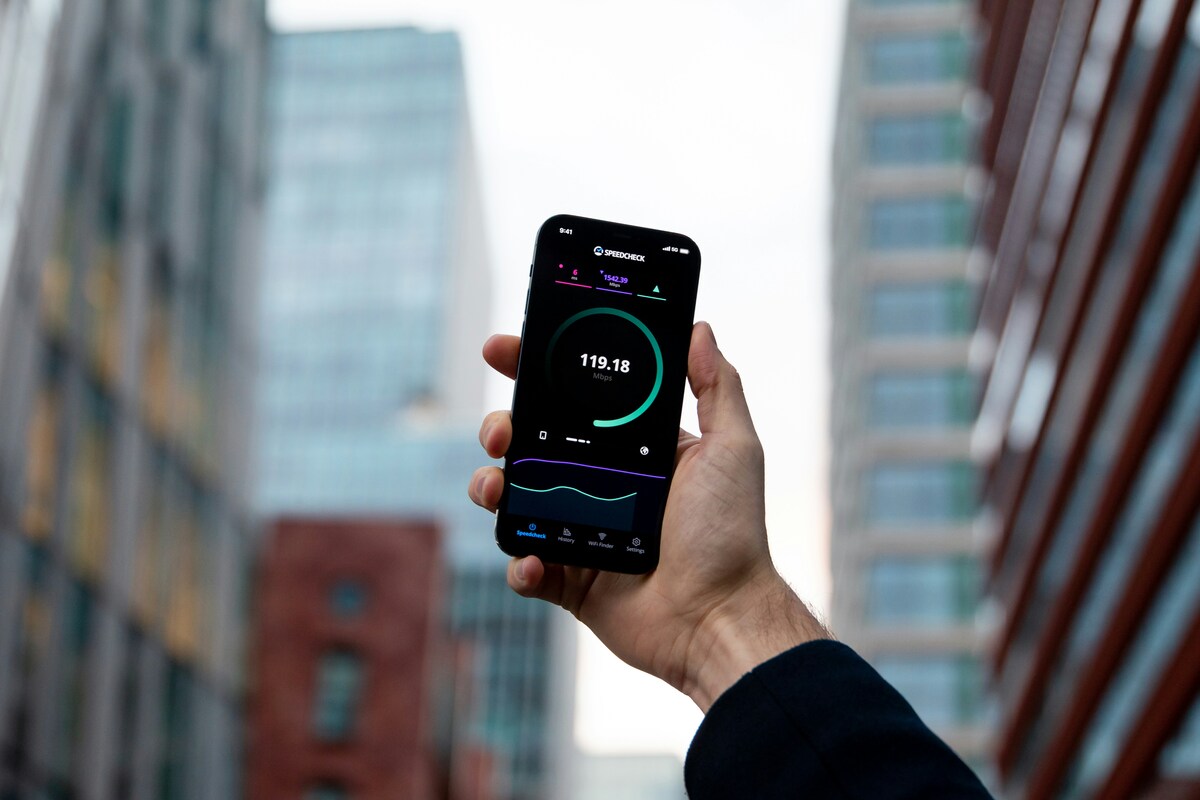
Without a reliable connection, even the best production setup cannot guarantee a smooth broadcast.
Most livestreams require at least:
10–20 Mbps upload speed (Note: Upload speed is what matters for streaming, not download speed).
However, this can vary depending on the video quality and platform being used. High-definition 1080p streams at 60 frames per second may require closer to 15-20 Mbps of consistent, dedicated overhead.
Many professional livestream teams also bring backup internet solutions, such as bonded cellular connections, which combine multiple mobile networks to provide additional reliability.
This redundancy helps reduce the risk of connection issues during the broadcast.
Early Access to the Venue
Livestream setups require time before the event begins. The complexity of cabling, networking, and lighting means the team cannot simply "plug and play".
In most cases, the production team will need 1–2 hours of access to the venue before the event starts.
This time is used for:
- camera setup and positioning
- connecting to the venue audio system
- testing the internet connection
- configuring graphics and slides
- running technical checks
For larger productions with multiple cameras or complex staging, additional setup time may be required.
Providing early access ensures the team can complete all technical checks before attendees arrive.
Access to the Sound System
If the venue has a built-in audio system, the livestream team will typically connect directly to the audio mixing desk.
This allows the broadcast to capture clean audio from the microphones already being used during the event. It prevents the "echoey" sound of a camera microphone picking up audio from the room's loudspeakers.
The production team may need access to:
- the venue sound desk
- microphone outputs
- auxiliary audio feeds
Working with the venue’s sound technician helps ensure the livestream receives a clean and balanced audio signal. Effective communication here is key—the livestream team needs to know if the house technician plans to "mute" certain mics between speakers so they can adjust the stream accordingly.
Presentation Feed for Slides
Many corporate events include presentations, slides, or videos displayed on screens in the room. If the remote audience only sees a camera pointed at a projector screen, the text will often be blurry or "washed out" by the lights.
For online viewers to see these clearly, the livestream team may need access to the presentation feed. This ensures the viewers see a crisp, digital-direct copy of the slides.
This could involve:
- connecting to the presenter’s laptop via an HDMI splitter.
- taking a direct feed from the presentation system (like a Barco Switcher).
- receiving presentation files in advance to load into the streaming software.
Including slides directly in the livestream feed allows viewers to follow the presentation more easily, especially during detailed talks or technical sessions. Professional setups often use a "Side-by-Side" layout where the speaker is on the left and the slides are on the right.
Power Access
Livestream equipment requires access to standard power outlets within the venue.
Typical equipment needing power includes:
- cameras
- monitors
- switching equipment
- streaming hardware
- lighting (if used)
Most venues can easily accommodate these requirements, but it is still helpful for the production team to confirm power access during the planning stage. Ideally, the streaming "Control Hub" should be on a separate circuit from high-draw items like coffee machines or heavy stage lighting to avoid blown fuses.
How Long Does a Livestream Setup Take?
To ensure everything runs smoothly, livestream events usually follow a structured setup timeline. Rushing the setup is where most technical errors occur.
While the exact schedule can vary depending on the event size, a typical timeline might look like this:

2–3 Hours Before the Event
The production team arrives and begins the technical setup.
This stage includes:
- unloading and positioning equipment
- setting up cameras
- connecting to the audio system
- configuring the streaming hardware
- testing the internet connection
1 Hour Before the Event
Once the equipment is set up, the team runs final checks and rehearsals.
This may include:
- speaker microphone tests: Checking for interference or "popping."
- checking presentation slides: Ensuring all fonts and videos in the deck play correctly.
- confirming graphics and branding: Double-checking the spelling of speaker names.
- testing camera switching: Ensuring the director and camera ops are in sync.
- verifying stream stability: Running a "private" test stream to a hidden URL.
These final checks help identify any issues before the event begins.
10–15 Minutes Before Going Live
Many livestreams begin with a countdown screen or holding graphic. This serves as a "buffer" for the audience.
This allows viewers to join the stream early while the production team confirms everything is ready to start.
What Extra Services Can Enhance a Livestream?
Depending on the event, livestream production teams may also provide additional services that extend the value of the broadcast.
Common add-ons include:
- Live audience Q&A moderation: Managing digital questions from the web so the speaker can answer them alongside the in-person audience.
- Live chat management: Keeping the comments section clean, helpful, and engaged.
- Remote guest integration: Bringing in speakers from around the world via Zoom or specialized "vMix Call" links into the high-quality broadcast.
- Simultaneous streaming to multiple platforms: Known as "Multistreaming," this allows you to reach audiences on LinkedIn, YouTube, and your website at the same time.
- Recording the event for later viewing: Ensuring you have a high-bitrate "Master Copy" for your archives.
- Highlight clips for social media: Quickly editing the best 60-second moments to share on Instagram or TikTok immediately after the event.
These features can help maximise the impact of the event and allow the content to be reused long after the livestream has ended.
For many organisations, the livestream becomes a valuable piece of marketing content that can be repurposed across multiple channels.
Moving From Planning to Action
Now that you know what a professional livestream setup involves, it’s time to move from research to preparation. Whether you’re organising a corporate event, panel discussion, or product launch, having a clear checklist ensures no critical detail is missed. Planning is 90% of the battle; a well-prepared team can handle almost any technical curveball thrown their way.
With experience supporting Irish clients across a range of events, Mango Media can help guide you through the process and make sure your livestream runs smoothly from start to finish. We understand the local venues, the typical connectivity challenges in Ireland, and how to deliver a broadcast that meets international standards.
Conclusion
A professional livestream is more than just pointing a camera — it’s about cameras, switching, audio, and graphics working seamlessly together. With the right preparation, your event can run smoothly and impress both in-person and online audiences.
Ready to make it happen? Explore our video production services, get a quote in seconds with our instant price calculator, or get in touch today for a no-obligation conversation.
Frequently Asked Questions
What equipment do you need for a livestream?
A professional livestream setup typically includes multiple cameras, a video switcher, streaming encoders, broadcast software, and audio integration with the venue’s microphone system. Production teams also manage graphics, monitoring, and the live broadcast to platforms such as YouTube or LinkedIn.
What internet speed do you need for livestreaming an event?
Most professional livestreams require at least 10–20 Mbps upload speed for a stable broadcast. Higher speeds may be recommended depending on the video quality, and many production teams bring backup internet connections for reliability.
How long does it take to set up a livestream for an event?
Livestream setups usually take 1–3 hours before the event begins. This allows time for camera placement, audio integration, internet testing, and technical rehearsals to ensure everything runs smoothly before going live.
Similar blogs:


![How to Write a Promo Video Script (Free Template Included) [2026 Guide]](https://cdn.prod.website-files.com/6226fcc37e2eb518b6e69a7f/69c3804c0b9ea78696bd89e0_covertab11.jpeg)

.jpg)
%20(1)%20(1).jpg)
.jpg)


We'd love to hear from you! Reach out to us today for a chat about our services, pricing, or just to say hello!


